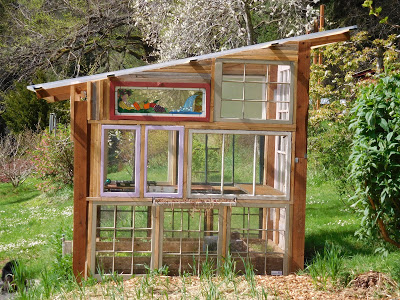
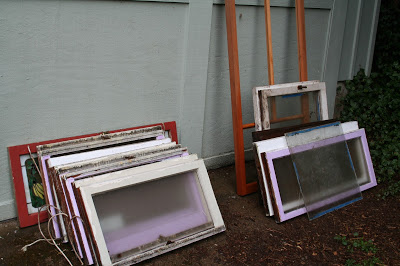
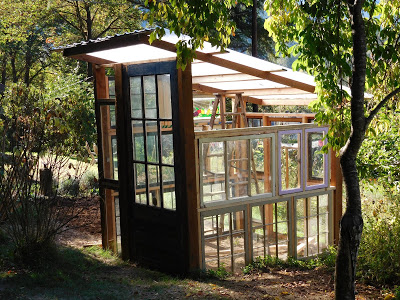
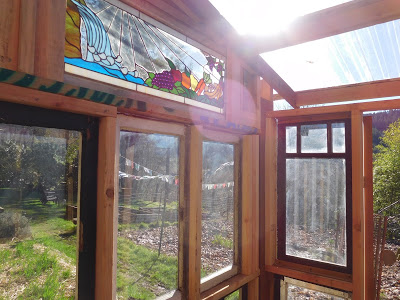
As is the story with many DIY-ers, an up-cycled glass window greenhouse project was on my to-do list for years. I started saving a window collection when we moved onto this homestead three years ago, and responded to a few “free window” offers from friends who were updating the windows on their houses. I even found a snazzy antique grange door and stained glass window left here in our barn that I wanted to incorporate as key pieces. A lot of folks I know have the same window stash with the very same intentions as mine, but I am proud to say that this year we actually did it! We completed our glass window greenhouse project this spring, almost entirely out of re-purposed materials and now I’m not sure how we ever got by without it.
The window collection that I mentioned grew for a while in our shed, until we had enough seedling losses and mishaps that we decided the greenhouse was an essential. The project was fast tracked to the top of the list.
We started by identifying our location and maximum footprint. The spot
we picked was close to the garden and next to a spigot fed by the
spring. When Corey’s parents were visiting, his dad helped us calculate
out what windows to fit together for each side based on the footprint and drew up some plans. Then Corey got to work digging the four post holes and leveling out the floor.
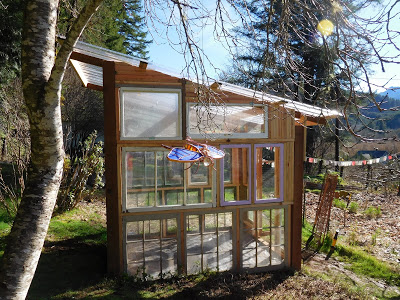
Aside from setting the four support posts in concrete, the project took a pause there as the summer got busy, and resumed in the fall with putting on the clear corrugated roof, framing in the front door and framing windows in on the walls one layer at a time. We would make a row of windows of the same height, secure them to a 2×4 along the top, and create the next layer the same way above them. We were lucky at this point in the project to have another friend donate his unused window stash to the cause.
Because we were fitting a lot of different, funky shaped windows together, there were some gaps and a lot of shimming was involved. We felt like this was OK for this particular type of greenhouse because our climate doesn’t get THAT cold, and the biggest issue with most glass window greenhouses is not enough ventilation. We ended up having to secure the shims in place with wood glue after they started to fall out when temperatures changed and things contracted.
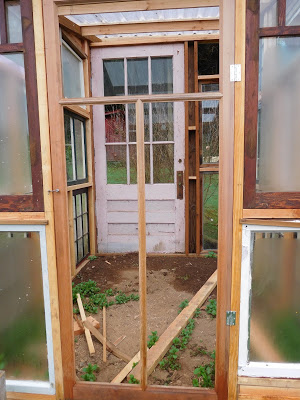
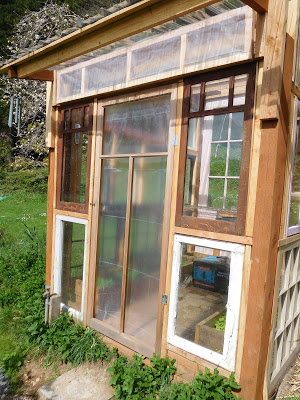
We used an empty window frame for the door, which we later covered with greenhouse plastic. The door was set up to latch open, and a couple of the windows were hinged to prop open in summer.
The issue of the corners at the top were solved by filling in with 2×2 strips cut at an angle at the ends so they were flush with slope of the roof line.
By the early spring, we had gotten most of the shimming done and were ready to tackle the floor, raised beds and benches in time for planting time.
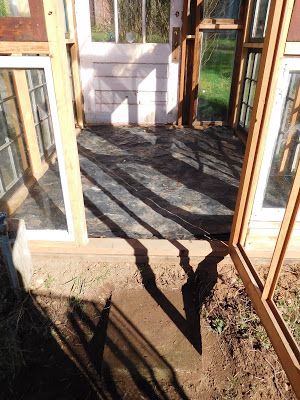
We set in a concrete block for the step up into the greenhouse (it was built at the edge of a small terrace), and put down some black plastic on the floor. The idea was to deter grass and nearby mint from coming up inside.
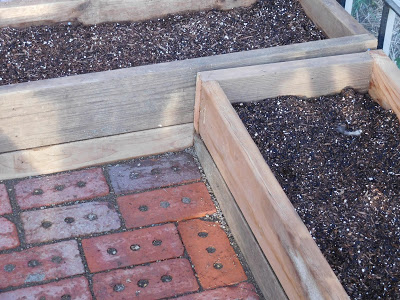
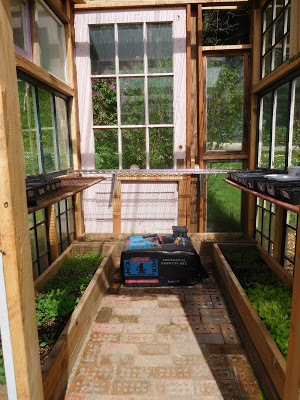
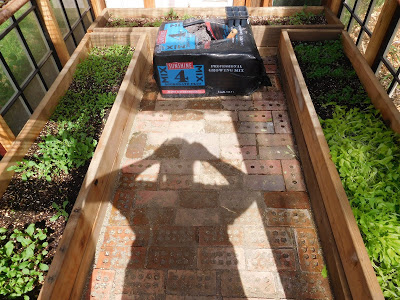
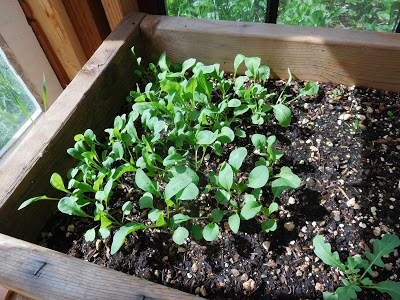
We built narrow raised beds out of recycled cedar decking boards around the perimeter of the floor and got them filled in with potting soil. Then we took some recycled bricks I had been saving from an intended project when I lived in the farm cottage at Empty Gate, and set them in on a layer of sand with more sand in the cracks in between. Once we watered them in a few times, it was a solid floor with good drainage from the slight downhill slope to the front of the greenhouse.
To fill in the gap along the top front, Corey made a frame covered in greenhouse plastic to latch open on hot days and get a cross breeze going.
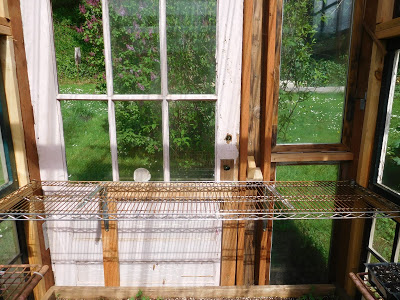
For the frames, we used a couple of metal grid panels that we unearthed from the brambles along our fence. They fit perfectly on the sides. We fastened them with heavy duty zip ties onto sturdy “L” brackets along the vertical 2×4 framing.
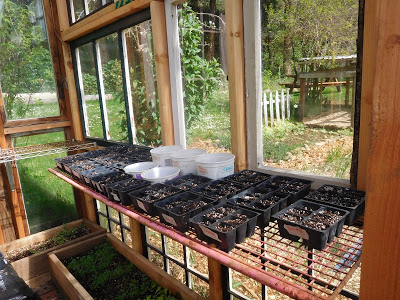
For the back bench, we just happened to find a metal shelf at the recycled building goods store that fit EXACTLY in place. We did the same “L” bracket and zip tie routine, and it was good to go for holding wet seed trays.
It was exciting to get those starts going and know that they were safe from the mice, slugs, marauding cats and other would-be seedling killers.
I wasted no time planting kale, lettuce, cilantro and 5 different types of arugula. I really love arugula in case you couldn’t tell.
There is nothing quite like eating salads out of your own greenhouse in the early spring, and going out to plant and water seedlings in the morning. Now we can extend our season of home grown greens into the fall as well with greens and winter lettuces. Not to mention, it makes a great reading spot on sunny winter days. I may be biased, but I think everyone needs a greenhouse for better quality of life. Mine is certainly improved with a greenhouse in it.
Thank you so much! I’ve been wanting to build a greenhouse for quite some time we keep putting temporary plastic covered PVC ones up. My husband has finally acquiesced to me building us a permanent one myself! This is fantastic it really gives me a good starter idea and then develop it into my own. Thank you so much for sharing.
I’m so glad to hear this post was helpful! After trying lots of temporary structures, I was so exciting to finally build a permanent one. I hope you enjoy building yours!
I have been collecting windows & doors for a couple of years. Hopefully this is the year my husband & I get our greenhouse built. I love the look & size of your. Thank you for the tips and info. What are the dimensions for your greenhouse?
Collecting windows and doors is where I started! Ours is roughly 6 x 8. Enjoy building your greenhouse!
I like your photos. Your simple design works well. I like the fact that you use plastic where a glass panel won’t fit, and it makes good sense for the door. The posts would make it very secure. Very practical.